Week 4 Update
- Bradley Schulz
- Feb 4, 2023
- 2 min read
Matrix Mania!
Goals from This Past Week
Team goals: Get the combined classification system functioning on the H7
Personal goals: Re-implement any functions that are not automatically included by default on MicroPython.
Accomplishments
After talking with Tyler, I revised my goals for this week to be to get the LED matrix working. Since Tyler is more familiar with MicroPython than me due to his work in prior weeks, we figured the optimal use of time is to have him focus on reimplementing the functions we need that are not already in MicroPython. So while he worked on that, I changed my personal goal to focus on the matrix that will display the results of our classification system.
Here is a quick video of an intro animation and illuminating pairs of LEDs that each represent 1 card in play.
Hardware Setup
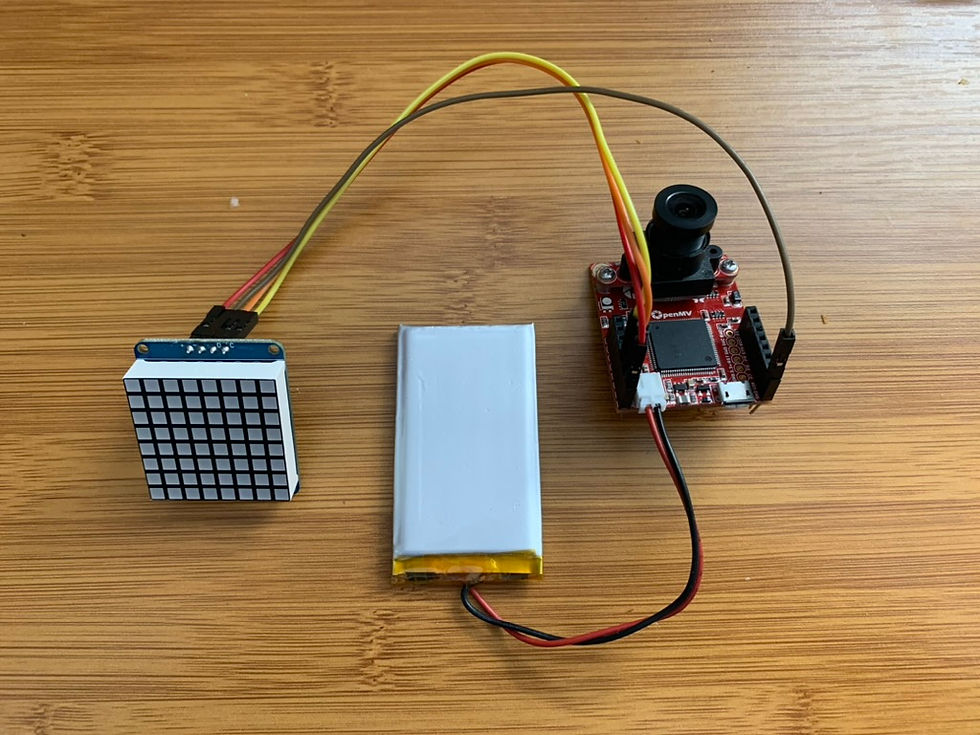
We decided to use a pre-made LED matrix instead of making our own. This makes the hardware component cleaner, easier, and more reliable. The matrix we decided to go with is here, and it uses this accompanying driver.
The hardware setup is very simple, as I just have to connect for pins from the H7 board to the matrix.
H7 Pin | Matrix Pin |
3.3V | VCC |
GND | GND |
P5 | SDA |
P4 | SCL |

Code
Luckily, Adafruit already has a lot of code written for this driver (which we found from this tutorial). However, it is written for CircuitPython rather than MicroPython. So, I had to manually port the code to work on the OpenMV IDE. This involved rewriting a few library references and adding a few custom functions to customize the animations.
The code creates a Python object through which you can set individual pixel values or patterns on the matrix. This makes it very straightforward to interact with the matrix.
m = MatrixController()m.set_image("Up") # Set the screen to be a pre-programmed imagem.set_card(i, True) # Turn on two pixels corresponding to card (i)I also wrote a function that converts a 2D array representing the desired matrix values to a compact representation in 8 bytes. It takes a representation like this:

And converts it to an array of 8, 8-bit integers that can be compactly stored on the H7.

Using bit-level manipulations, those 64 bits generate the corresponding shape on the matrix.

This system makes it very easy to add new images to the ones we can display on the matrix. The steps are to generate a new drawing are:
Design it using 1's and 0's in the 2D array
Run the script to condense it to 8-byte representation
Add the generated representation to the dictionary of images
Goals for Next Week
Team goals: Implement algorithms for whole design
Personal goals: Develop an algorithm to detect sets


Comments